Fixing Digital Piano Keys: Replacing Piano Keys Rubber Strip.
The Nightmare of Repairing my Yamaha P-105 Digital Piano.
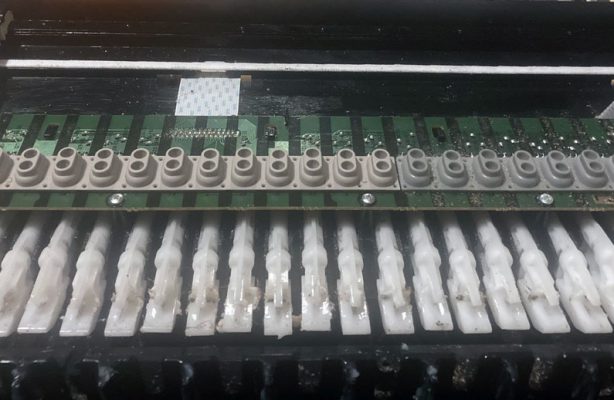
Digital keyboards use a rubber strip positioned between the keys and the circuit board to detect touch. When you play softly, the keys sound softer, and when you apply more pressure, the keys sound louder. However, as time goes on, this rubber strip wears down, resulting in keys that either sound at full volume, regardless of touch, or sometimes, don't produce sound at all. This can affect one, two, or more keys.

In my case, it was the middle Ab that sounded full volume when I played it, and it was driving me crazy. The options were to send it to a repair shop, purchase a new keyboard, or attempt the repair myself.
Buying a new one was out of the question, and a repair shop would cost between $150 and $250, and it could take up to a month. A week for the estimate, two weeks to get the part, and another week for the replacement.
So, I decided to take matters into my own hands. I found the replacement part on Amazon for $20, and it was described as "easy to replace," which encouraged me to proceed. The estimated delivery time was 15 days, and the only additional tool I required was a screwdriver.
I received the replacement part within a week. After completing my lesson, I decided to replace the worn-out rubber strip. I removed the first 4 screws to detach the keyboard from the stand, placed it on my kitchen table with a towel to protect the surface, and faced my first challenge.
Easy to replace? maybe, but first, you need to get to it.
There were 55 screws securing the back panel, and some were tucked deep inside slots, making them difficult to reach with fingers. A powered screwdriver with a magnetic tip would have been ideal for this task.
Of course, all I had was an ordinary screwdriver, although I found a small computer screwdriver with a magnetic tip, which I was able to use to get the screws out of some tight spots.
If your screwdriver is not magnetized, tweezers can be useful. However, I strongly recommend using a power screwdriver if possible, as it simplifies the task and ensures a smoother repair process.
After removing the 55 screws, I gained access to the back of the keyboard, but, to reach the rubber strip, I had to access the keys from the front side. So I had to detach the keyboard from the front panel.
First, I unplugged a couple of computer ribbon cables that connected the power to the circuitry. Next, to remove the keyboard from the case, there was another set of 9 screws to detach. Once I took those screws off, I was able to detach the front panel and get access to the keys.
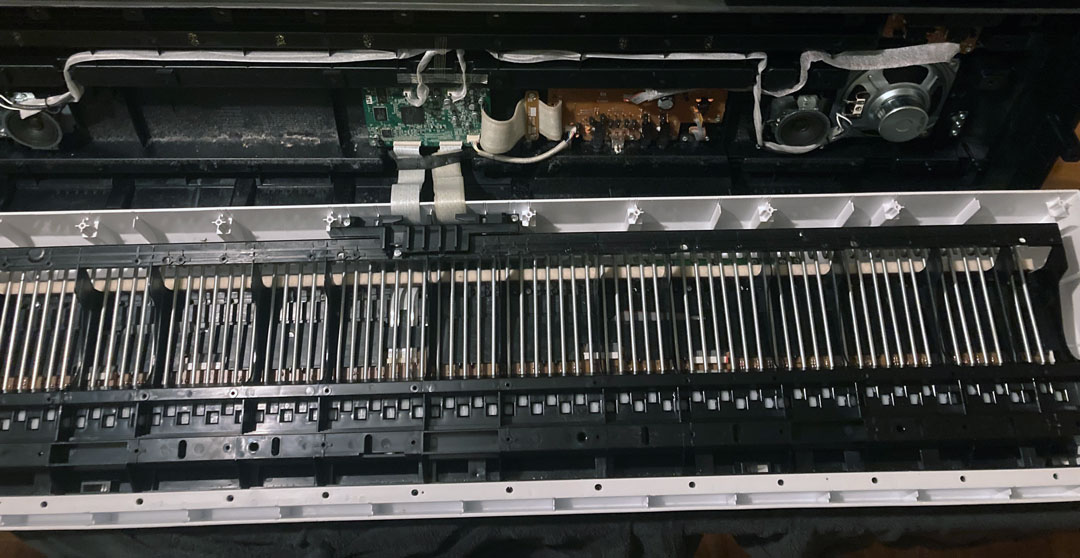
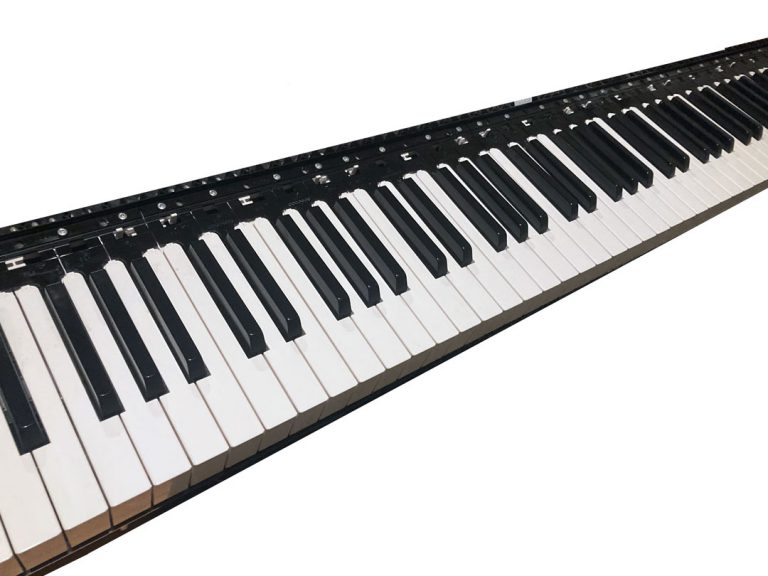
The keys are organized in sets of octaves, with 12 keys per set. Each octave is held in place by 3 screws. Although I only needed to replace the rubber strip in one octave, I had to remove the adjacent octave on the right, to get full access to it, to do that I had to remove 6 more screws.

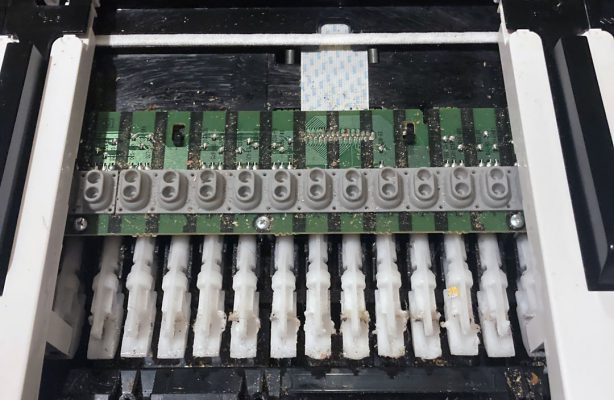
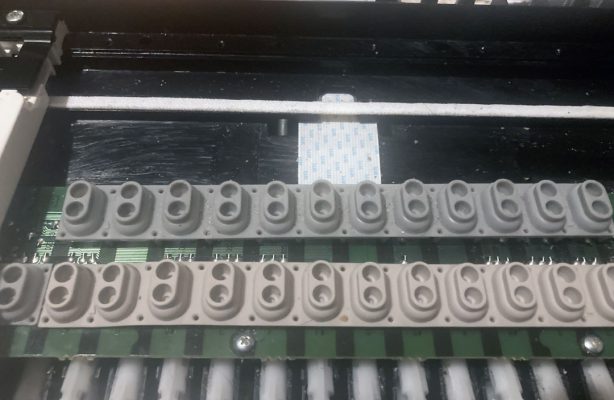
With the keys removed, I had access to the rubber strip, which didn't appear to have any visible damage. However, even a microscopic tear could lead to failure.
Although the rubber strip is not glued to the circuit board I had to carefully apply gradual force to remove the rubber strip. To avoid damage is important to work slowly and patiently remove it section by section.
Before replacing the part make sure to clean the circuit board I used a cotton square and rubbing alcohol.
To put it back on takes some skill and patience, the rubber strips have a little arrow that has to point up, and then you have to fit the little pieces of rubber that go into the wholes of the circuit board, you can't put them in one go, but you have to keep pressing down and releasing several times, you can use your fingers or a paper clip to do so, make sure to press down each part individually, to secure it in place.
After I successfully replaced the rubber strip, the critical question was: Would it work?
To make sure it works I would have to go through the nerve-wracking reassembly process. At this point, I made a calculated decision. Rather than putting all 75 screws back in place immediately, I opted to replace only a few. I wanted to ensure that the repair had indeed worked before going through the laborious task of securing all the screws.
So I put back the 2 sets of keys, (6 screws) then I reattach the front panel (9 screws). I reconnected the 2 ribbon cables, and I put back the back panel, but I only put back 4 screws. Then, I placed the keyboard back on the stand, without screwing it back.
I plug it in and, to my surprise, it works perfectly! So then I brought it back to my kitchen table and I put the rest of the 51 screws into place, one by one with the ordinary screwdriver was a nightmare!
In conclusion, aside from the stress and uncertainty, the most challenging part of the process was not having a power screwdriver with a magnetic tip, which would have significantly simplified the task. If you ever have this problem with your digital piano, don't panic, you can fix it. Just make sure to get the right part and a good screwdriver.